16 Craft Room Storage Ideas for an Organized Creative Space
Introduction
A messy craft room slows you down more than you think. You waste time looking for scissors, glue, or beads when you should be creating.
This happens because craft supplies grow fast. Most people do not have a system that keeps everything in place. Small rooms make this even harder.
In this guide, you will learn 16 craft room storage ideas that help you organize supplies, use small spaces better, and build a setup that actually works for daily crafting. These ideas are simple, practical, and based on real setups used in home studios and DIY spaces seen in Pinterest, YouTube craft room tours, and organizing communities.
You will also see how real tools like pegboards, clear bins, and rolling carts can change how your space feels and works.
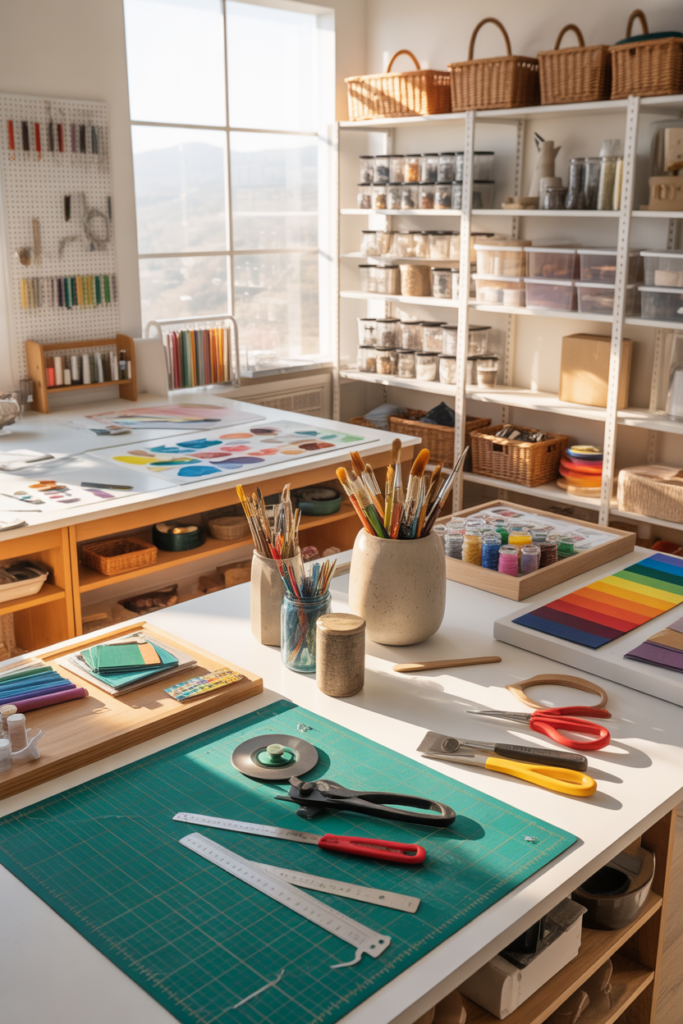
1. Use Wall Space to Free Your Table
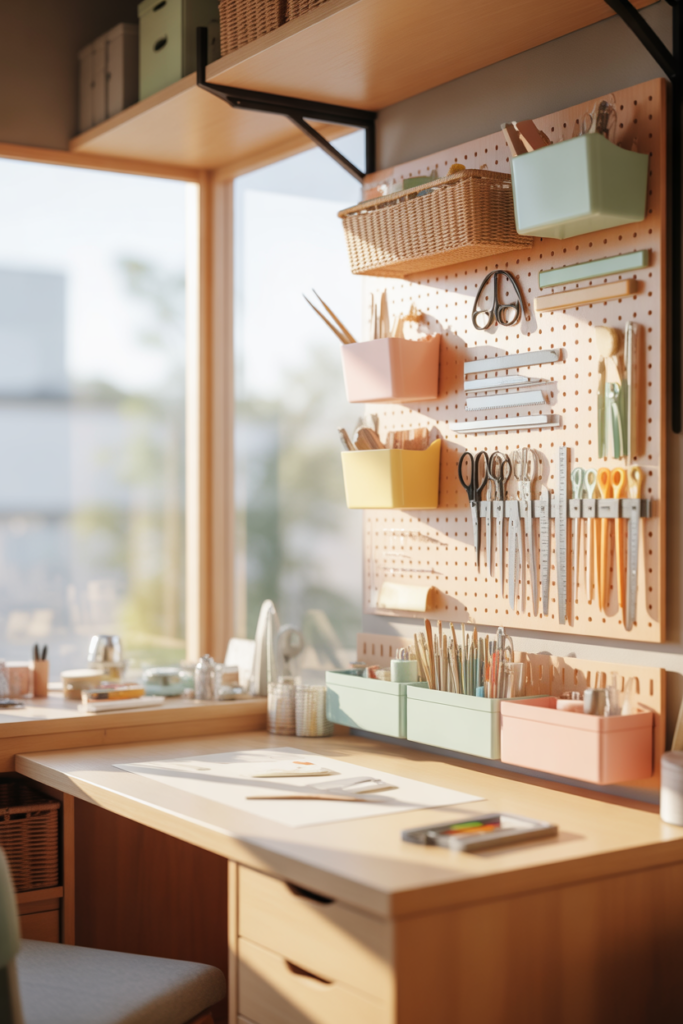
Most craft rooms feel small because the walls are empty while the table is overloaded. When you move storage upward, your workspace opens up.
Wall storage works because it keeps tools visible and easy to reach. Pegboards are one of the most popular options used in real craft rooms, especially systems like IKEA SKÅDIS. You can hang scissors, rulers, tape, and brushes in seconds.
Wall baskets also help store items you grab often. They keep small supplies off your desk but still close enough to reach fast.
Magnetic strips are another smart option. They hold metal tools like scissors or craft knives without taking space in drawers.
This setup is often shown in craft room tours on YouTube where creators focus on small rooms. The main idea is simple. If your table is full, your walls should help carry the load.
When you use wall storage well, your craft area feels bigger without changing the room size.
2. Stop Drawer Clutter Before It Starts
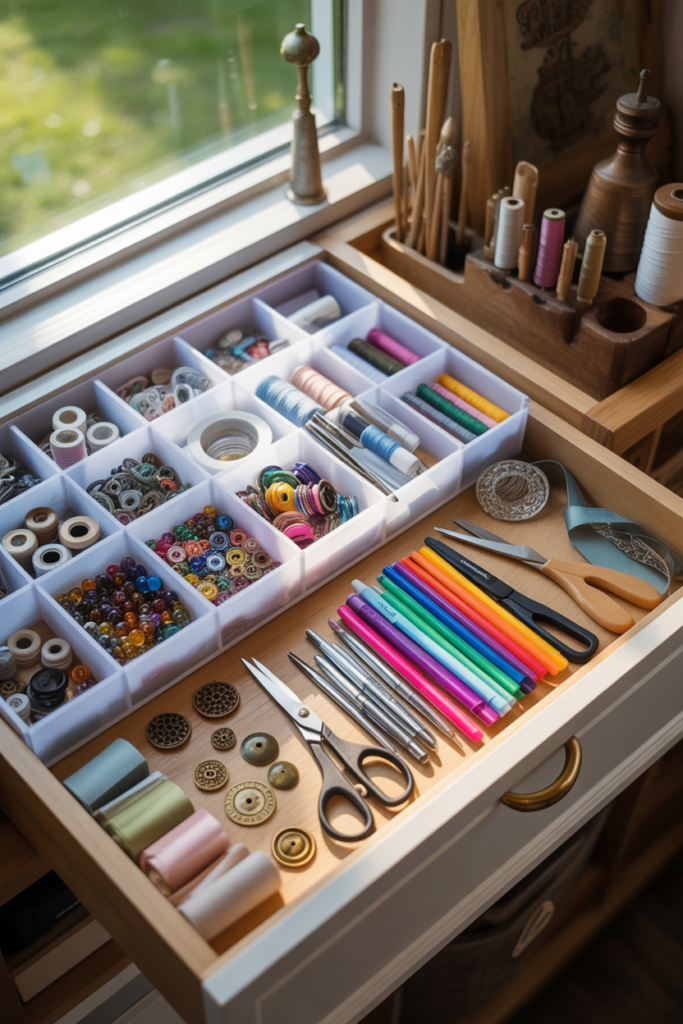
Drawers often become a hidden mess. You open them and everything is mixed together.
This happens because items are not separated inside the drawer. Dividers fix this problem in a simple way.
You can separate beads, glue sticks, threads, and small tools into clear sections. Adjustable dividers are helpful because they can change as your supplies grow.
Labeling each section also saves time. You do not need to search every time you start a project.
This method is widely used in home organization setups shown by The Container Store and craft creators on social platforms. The focus is always the same. Make every item easy to find.
When your drawers are organized, your whole workflow becomes smoother. You spend less time searching and more time creating.
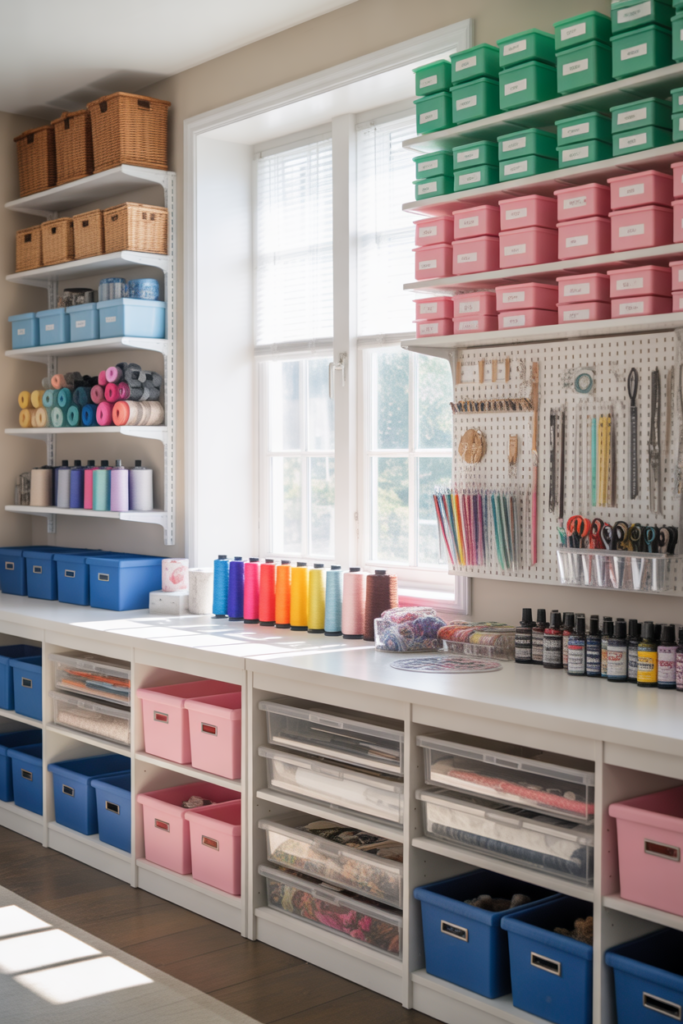
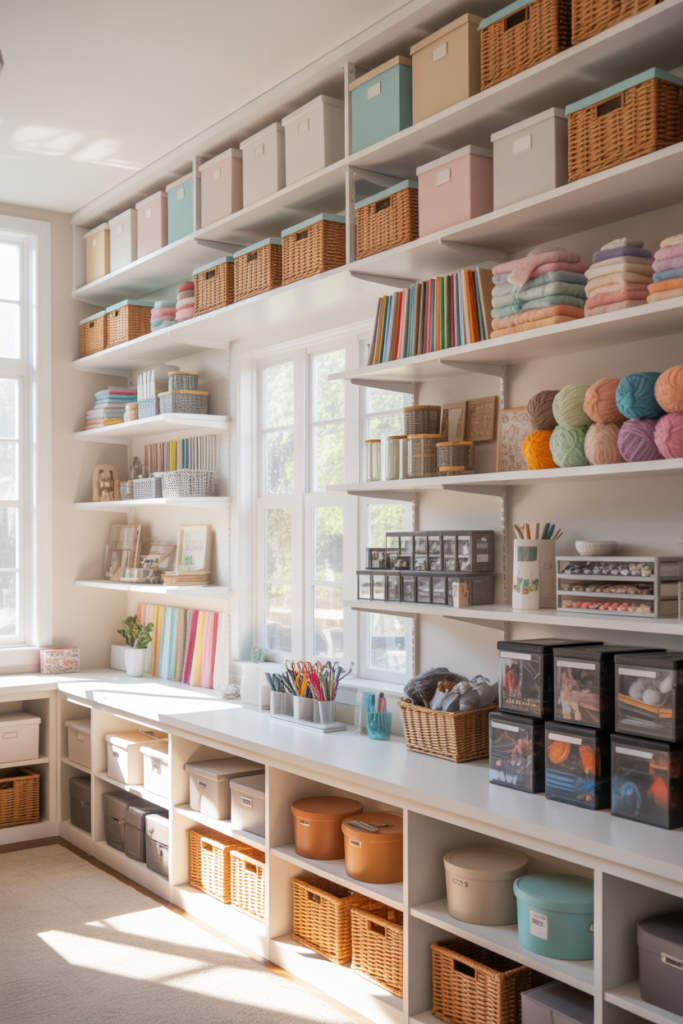
3. Use Clear Bins So You Can See Everything
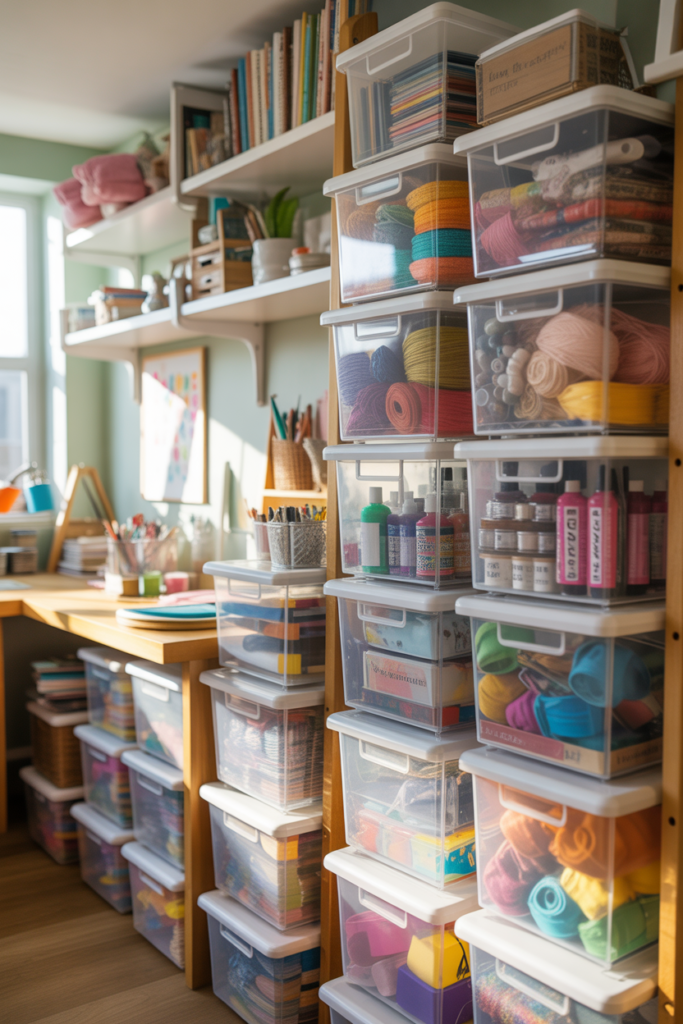
One of the biggest problems in craft rooms is forgetting what you already own.
Clear storage bins solve this because you can see everything at a glance. You do not need to open every box.
Stackable bins are even better for small rooms. They help you use vertical space without making the room feel crowded.
Grouping supplies by project type also helps. For example, keep sewing tools in one bin and paper craft supplies in another.
Many craft creators on Pinterest and YouTube use this system because it reduces confusion during projects. It also prevents buying duplicates.
When you can see your supplies clearly, you save both time and money.
4. Use Rolling Carts for Flexible Storage
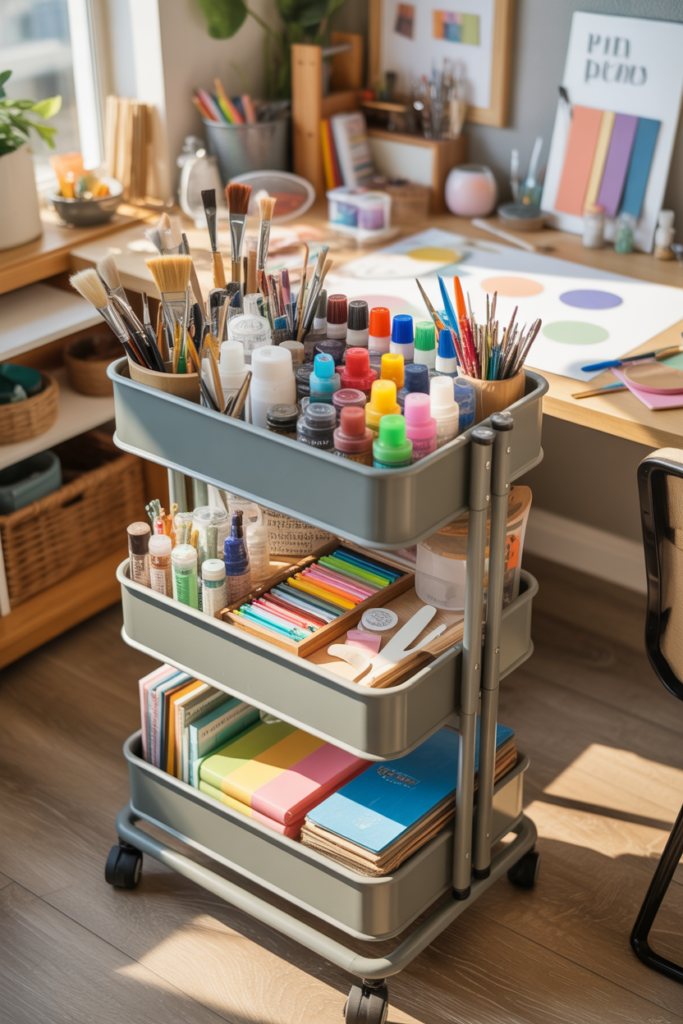
A rolling cart gives you storage that moves with you. This is helpful if you craft in different parts of your home.
You can keep one cart for active projects and another for storage supplies. Each level can hold different tools like paper, paints, or brushes.
This idea is popular because it works in small apartments. You can roll the cart under a desk or into a corner when not in use.
Many craft room setups online use the IKEA RÅSKOG cart because it fits small spaces well and holds a lot of supplies.
The key benefit is flexibility. Your supplies are not stuck in one place.
5. Use Door Space You Are Ignoring
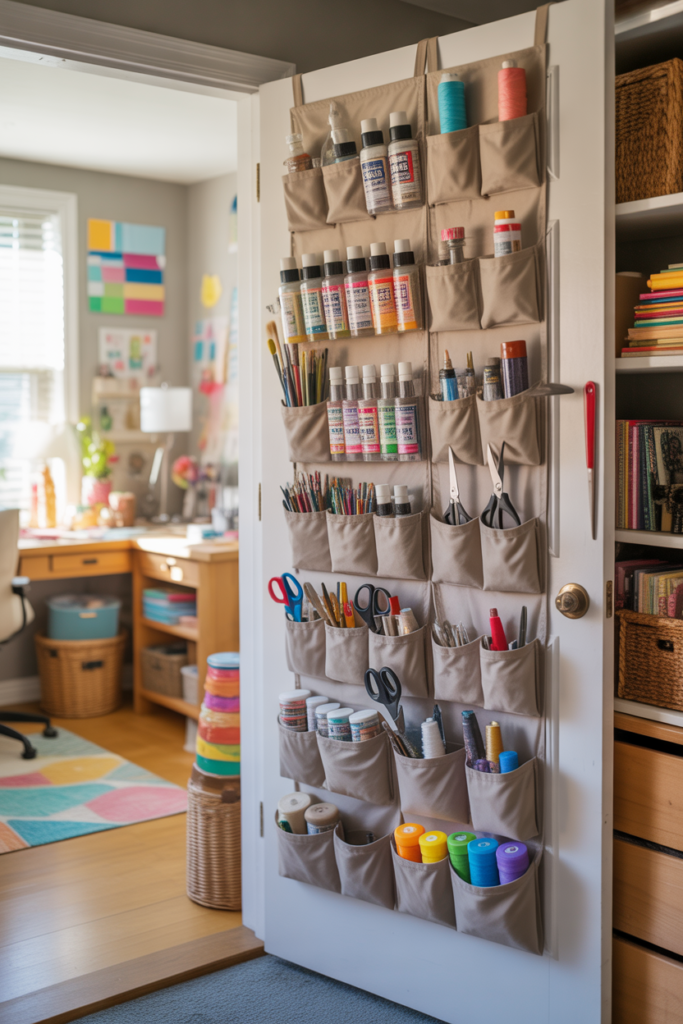
Most people forget about the back of doors. This space can hold a lot of craft supplies.
Hanging organizers designed for shoes can also hold craft items. You can store paints, ribbons, glue bottles, or tools in each pocket.
This method works well in rental homes because it does not require drilling or permanent changes.
It is also great for small rooms where floor space is limited.
When you use door storage, you gain extra storage without losing any room space.
6. Label Everything So You Stop Guessing
Labels may feel small, but they make a big difference in craft rooms.
When everything is labeled, you know exactly where things belong. This reduces clutter over time because items are always returned to the right place.
You can use printed labels, handwritten tags, or color coding.
Color coding works well for visual thinkers. For example, blue for sewing, pink for paper crafts, and green for tools.
Organizing experts often show this method in home organization videos because it builds long term habits.
When you label clearly, your system stays clean without constant effort.
7. Add Simple Shelves for Daily Supplies
Floating shelves give you storage without taking floor space.
You can use them to store jars, boxes, or tools you use every day. They also let you display items in a neat way.
Glass jars on shelves are popular because they show small items like buttons or beads clearly.
This setup is often seen in DIY craft room builds where people mix storage with decoration.
Shelves work best when you keep them simple. Too many items can make them look crowded.
A good rule is to store only what you use often.
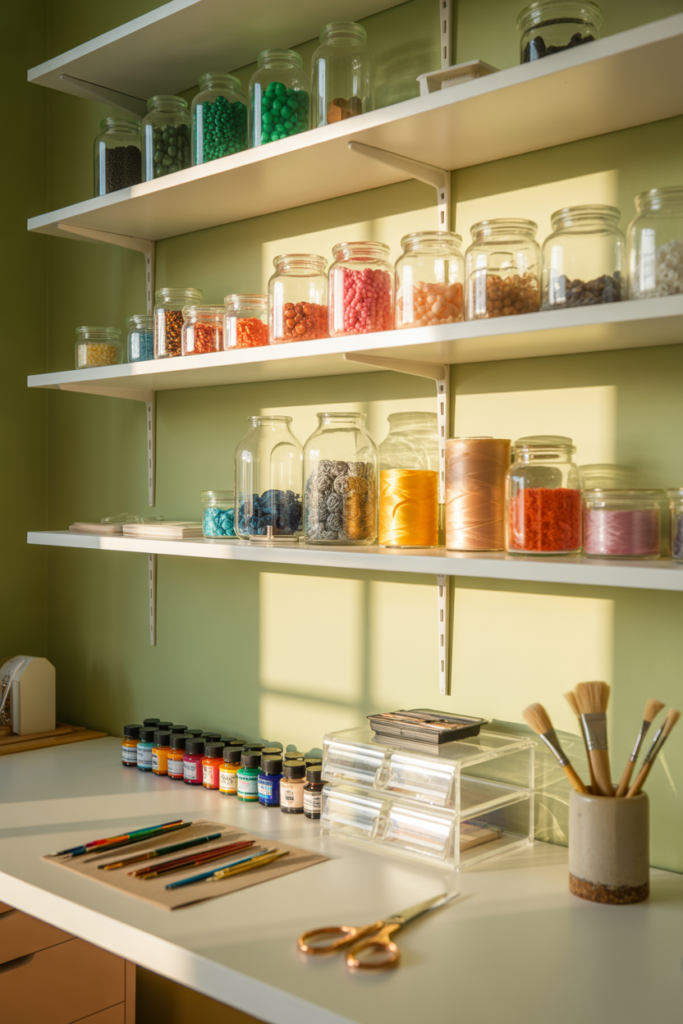
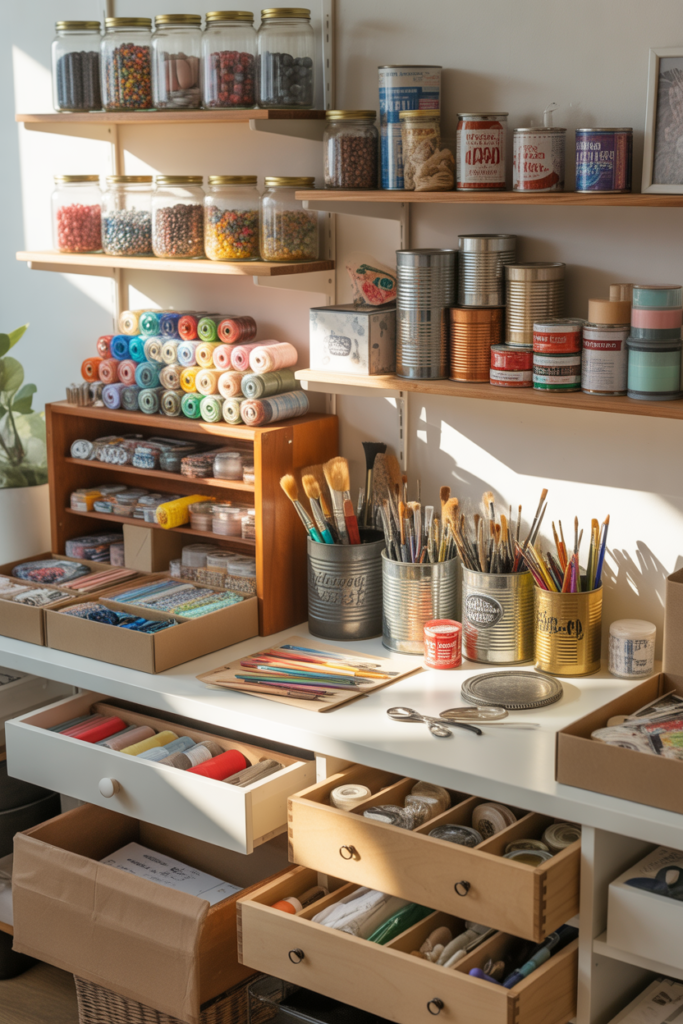
8. Use Jars for Small Items That Get Lost Easily
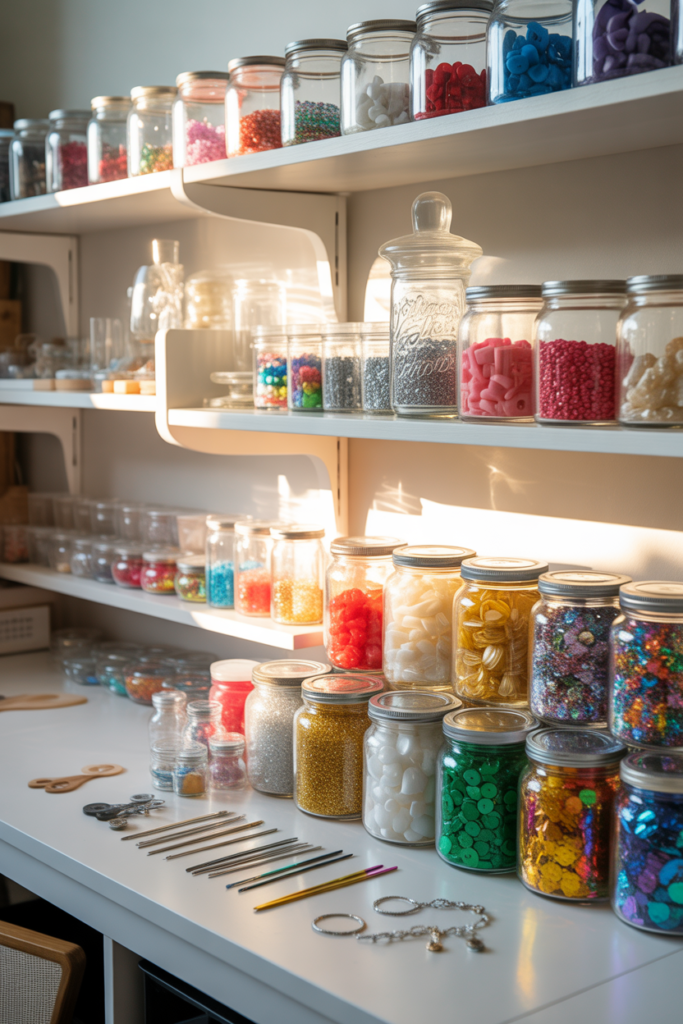
Small craft items disappear quickly when they are not stored properly.
Jars solve this problem by keeping everything visible and contained.
You can use glass jars for beads, buttons, glitter, or pins. Labeling the lids helps you find things faster.
Stackable jars also save space on shelves or desks.
Many crafters prefer this method because it keeps small items from mixing together.
When everything is in a jar, nothing gets lost at the bottom of a drawer.
9. Turn a Closet Into a Mini Craft Station
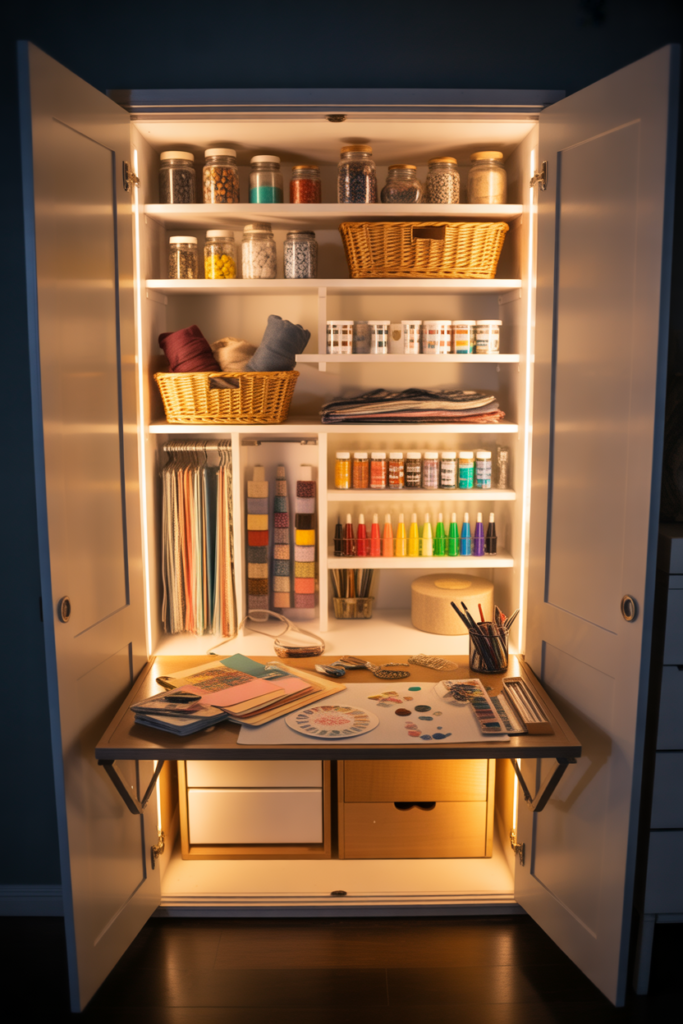
A closet can become one of the best craft storage spaces in your home.
You can add shelves inside to hold bins and tools. A small foldable table can turn it into a working station.
Lighting is important here. A simple LED strip or lamp can make the space usable.
This idea is often shown in small apartment makeover videos where people turn unused closets into craft zones.
The benefit is privacy. You can close the doors when you are done and keep everything hidden.
10. Keep Daily Tools on Your Desk

Your desk should only hold the tools you use every day.
Pen holders, brush cups, and small trays help keep these items organized.
If your desk is full, your mind feels full too.
Simple desktop organizers help reduce this clutter. You can also rotate items based on your current project.
This keeps your workspace clean and easy to use.
11. Store Fabric in a Clean and Simple Way

Fabric storage can become messy fast if it is not sorted properly.
Folding fabric into labeled bins helps keep it neat and visible.
You can also sort fabric by color or type. This makes it easier to choose materials during projects.
Some crafters hang fabric on racks, which prevents deep folds and keeps it easy to access.
A clear system helps you avoid wasting time searching for the right piece.
12. Organize Ribbon and Tape Before It Tangels
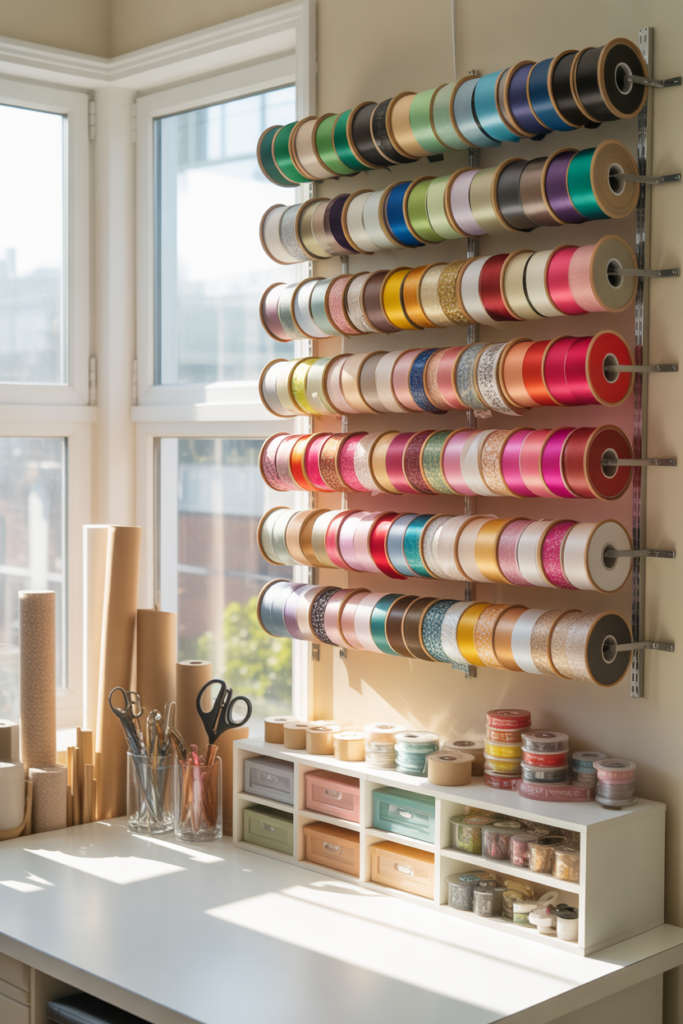
Ribbons and tape often turn into knots when stored loosely.
Spool holders or wall racks solve this problem.
Each roll stays separate and easy to pull from.
This setup also helps you see all colors at once, which makes choosing faster.
Many DIY craft setups use simple rods or wall hooks for this purpose.
13. Use High Shelves for Items You Rarely Touch
Not everything needs to stay at eye level.
Seasonal or rarely used supplies can go on higher shelves.
This frees your main workspace for active materials.
Labeling boxes on high shelves is important so you do not forget what is stored there.
This system keeps your main area clean without losing storage space.
14. Use Foldable Tables to Save Space
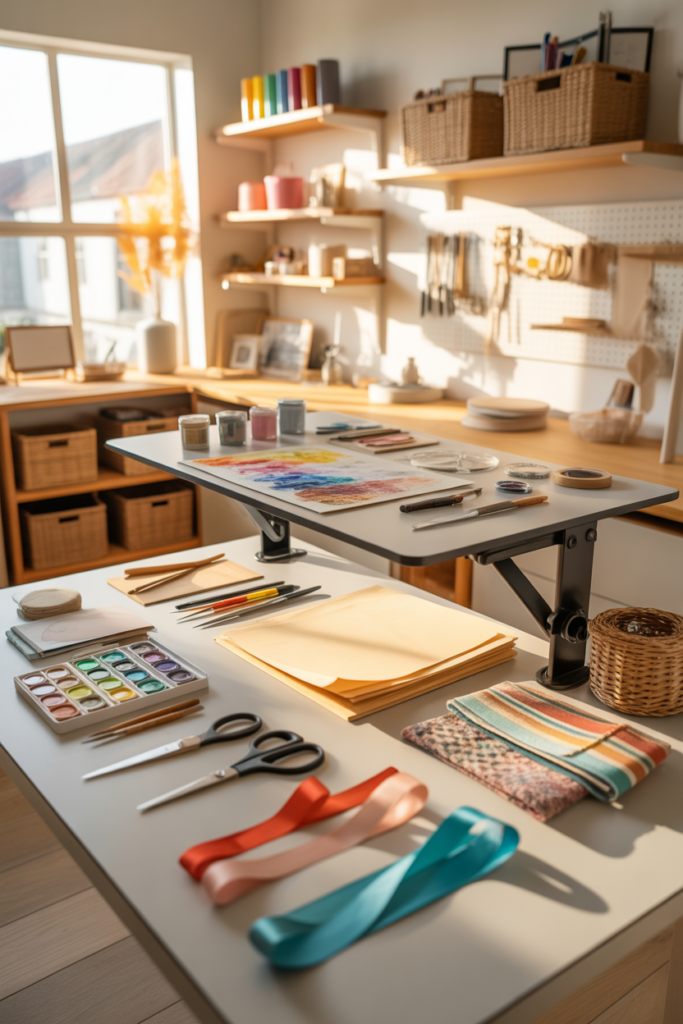
A foldable table is useful when space is limited.
You can open it when crafting and fold it away when finished.
Wall mounted drop down tables are common in small craft rooms.
They give you a full workspace without taking permanent floor space.
This is a simple way to make small rooms more flexible
15. Create Separate Zones in Your Craft Room
A craft room works better when each activity has its own space.
You can set one area for cutting, another for storage, and another for crafting.
This reduces confusion and keeps tools where you need them.
Even in small rooms, zones can be created using shelves or table placement.
This setup helps your workflow feel smoother and more organized.
16. Use Simple DIY Storage Hacks to Save Money
You do not need expensive systems to organize your craft room.
You can reuse jars, boxes, and containers you already have.
Cardboard boxes can become drawer dividers.
Old containers can hold tools or supplies.
Many DIY creators use basic materials to build effective storage systems without spending much.
The key is consistency. Every item should have a place.
Conclusion
A well organized craft room makes creativity easier and faster. You spend less time searching and more time making.
These 16 craft room storage ideas help you use small spaces better, reduce clutter, and build a system that fits your needs.
Start with one change, like wall storage or drawer dividers. Then slowly improve the rest of your space.
When your craft room works well, your ideas flow better too.